Hello readers. Since my last post was a skincare post, I decided to go to the next level and share with you my favourite base makeup products and how I apply them to get a flawless finish to set me up for the rest of my makeup look. As I mentioned before, I have oily skin and rosacea; which means makeup is always a struggle for me. But yet again, as with my skincare, I’ve managed to get my makeup base application down to a great routine.
Now before I start, I will just say that this is the base for a full face of makeup. I don’t wear this every day, because there is no need for a full face unless you really need it; and also, who has time for a full face every day? I will probably share my fast, everyday makeup routine in another post. Some great ideas to look flawless on a time limit – I’ve been practising because I know when I’m a mum, my makeup time might be a little sparse. But without further ado, keep reading if you want to know how to get a flawless makeup base that will last all day, even with oily skin. I am sure that all of the products except the first one I mention have been previously talked about on my blog, both here; and here. There’s a reason I raved about them so much then, and why I’m still using them now. They’re just so good; however this is a slightly more in-depth post about the way I apply each product and why I love them.
Step 1 – Primer
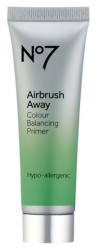
I’m a firm believer that a primer can make or break your look. There’s a bit of a science to it. If your foundation is oil-based, you’ll need an oil-based primer. If your foundation is silicone-based, you’ll need a silicone-based primer. And if your foundation is water-based, you’ll need a water-based primer. My foundation is silicone based, so I opt for two different primers. The first primer is the No7 Airbrush Away Colour Balancing Primer in green. I apply it with a damp sponge using a dabbing motion (The AOA Wonder Blender from Shop Miss A is my Favourite sponge currently) to the areas that are in need of some redness neutralizing – usually my cheeks.
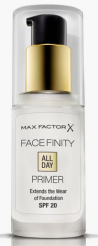
Then I go in with the Max Factor Facefinity Primer; which I apply with my (clean!) fingers, all over my face. It’s a really great mattifying primer that doesn’t feel too heavy on the silicone which means that the foundation doesn’t slide off. It also has some serious staying power; which is what I look for in most of my base makeup – because my oil usually makes it slide off within hours if it’s not a long-lasting product.
Step 2 – Foundation
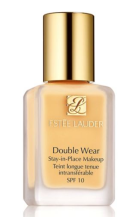
I freaking LOVE this foundation and have yet to find anything better. You should have guessed it by now, but in case you haven’t, it’s the Estee Lauder Double Wear Foundation. For oily skin types this is so good. It’s not full coverage but a couple of coats nicely covers everything I need it to; and if you’re using concealer anyway (Which I do) then it won’t matter. I apply a few drops to the back of my hand (usually 2-3 pumps) and dab it on with a damp sponge (the one I’ve used for the primer is totally fine to use).
For info, I use the shade 2C3 – Fresco
Step 3 – Concealer

When I’m done with the foundation and happy with the coverage, I go in with the concealer. My all-time favourite concealer to date has to be the Makeup Revolution Conceal and Define Concealer. It’s supposedly a dupe for Tarte Shape Tape – but since I haven’t tried it yet I can’t say how it measures up. This has a doe-foot style applicator, so I paint it onto my face in the areas that need extra coverage – usually my forehead, under my eyes, my nose, lower cheeks and chin; plus any blemishes. I then blend it out using the same damp sponge in dabbing motions. The dabbing is important because if you wipe or sweep the sponge, all you’ll end up doing is pushing product around your face and wiping off what’s underneath; making you look streaky. This concealer is such a good, full-coverage concealer that by this stage I usually look like I’ve had all my features erased. When I paint them back on, my “second skin” looks so flawless.
For info, my shade is C3 (I used to use C5, but found I looked a little too tanned)
Step 4 – Powder
Now, I love having flawless, matte skin; but I don’t want to look flat. It needs to have a little bit of dewiness to it in order to look like actual skin. So the setting powder needs to be the product that does that. And a trick I like to use is to mix a very small amount of loose highlighter pigment into my loose setting powder to give that gorgeous healthy glow.
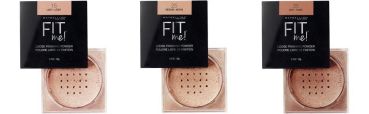
The base powder that I use is the Maybelline Fit Me Loose Powder. It’s not yet available in the UK directly from Maybelline (despite so many beauty influencers begging them); but you can get it on eBay at a reasonable price. For info, I use the shade 05 Fair (I used to use the shade 10 Fair / Light, but it was a bit too yellow for my skin)
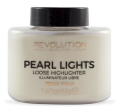
The powder highlight I mix with the setting powder (in a ratio of approx. 1:5) is the Makeup Revolution Pearl Lights Loose Highlighter in the shade “True Gold”. When I’ve mixed the two together I use that same damp sponge (I know, it gets a LOT of use) to pick it up and press it into my skin. Dabbing again; I pack it all in, all over my face. A lot of people bake at this stage, pressing it into the oily areas and under eyes then gently and dusting off any excess, adding a sheer dusting to any areas that haven’t been covered; but I tend to just push it right into every part of my face; because I have such bad oil that the powder helps to keep it under control.
Once I’m done with the powder, then I’m ready to go on with the other parts of my makeup routine, including the bronzer, blusher, highlighter, eyes, brows and lips.
Step 5 – Setting Spray
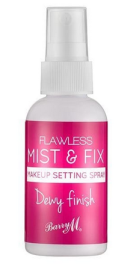
The final part to a good base is actually the last step in the routine, but it takes all that powderiness and turns it back into flawless-looking skin. Normally I use two setting sprays. One to give me a little bit of extra glow; and one to seal everything in and make sure it all stays locked in place. The first spray I use is the BarryM Mist & Fix Dewy Finish Setting Spray which I shake vigorously to release all the shimmery particles; then spritz on. Before it dries I use my sponge (again!) to dab at any chunky spots of shimmer so it doesn’t look like I have sparkly freckles. Then I use a fan to dry it.
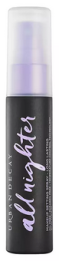
The second spray is the famous All Nighter setting spray from Urban Decay. I spritz it on once my face is dry and then fan again.
And there you have it. My steps to a flawless base for creating looks that will stay in place all day long, even with oily skin; that looks smooth and matte, without looking cakey.
Do you have any other steps? Any products you would recommend? Would you use these products / techniques? Drop me a comment below. And don’t forget to follow me if you want to see more of these posts. Your following really makes me happy!

Leave a comment